
In this article, you’ll learn about the importance of building a targeted audience in marketing, and how you can combine Mailchimp and Drupal to create effective email marketing campaigns.
Have you ever launched an email campaign only to find that your message went off in the wrong direction? If you’ve experienced the frustration of a well-crafted email going unnoticed, you’re not alone.
Email marketing mishaps become even more challenging when you don’t have the right tools. Combining the power of a good content management system (such as Drupal) and a handy email marketing platform (such as Mailchimp), you can rarely go wrong with your audience or messaging. How? Let’s dive right in!
Smart Targeting: the Core of Effective Marketing
Why is it important to market to a targeted audience?
Imagine this: a fitness apparel company selling high-performance athletic wear launches a new line of cutting-edge shoes. Now instead of targeting serious runners and fitness enthusiasts (likely to buy the shoes), their email marketing campaign sends out a blast email to all of their customers and mailing list subscribers. Furthermore, the message is generic and doesn’t highlight the core features of the product. What does this result in?
- It leads to ignored or un-opened emails (and possibly even unsubscribes), causing low engagement.
- Because it’s not the right messaging, it won’t resonate with serious runners due to low relevance.
- It’s a missed opportunity that causes low conversions.
- It may generate negative brand perception.
Now, would you want that for your brand? Probably not. Setting target audiences is crucial for ensuring that your marketing efforts resonate with the right people, increasing engagement, conversions, and overall campaign effectiveness. It begins with audience segmentation, right from your Drupal-powered website. A Drupal–Mailchimp duo can empower you to synchronize your audience data and behavior, thus implementing precise targeting.
Synchronizing Drupal and Mailchimp
Now, I’m taking the liberty of assuming that you know the basic working of both Drupal and Mailchimp. Let’s go step by step together to set up the Mailchimp module in your Drupal website.
Step 1: Installing and enabling the Mailchimp module in Drupal
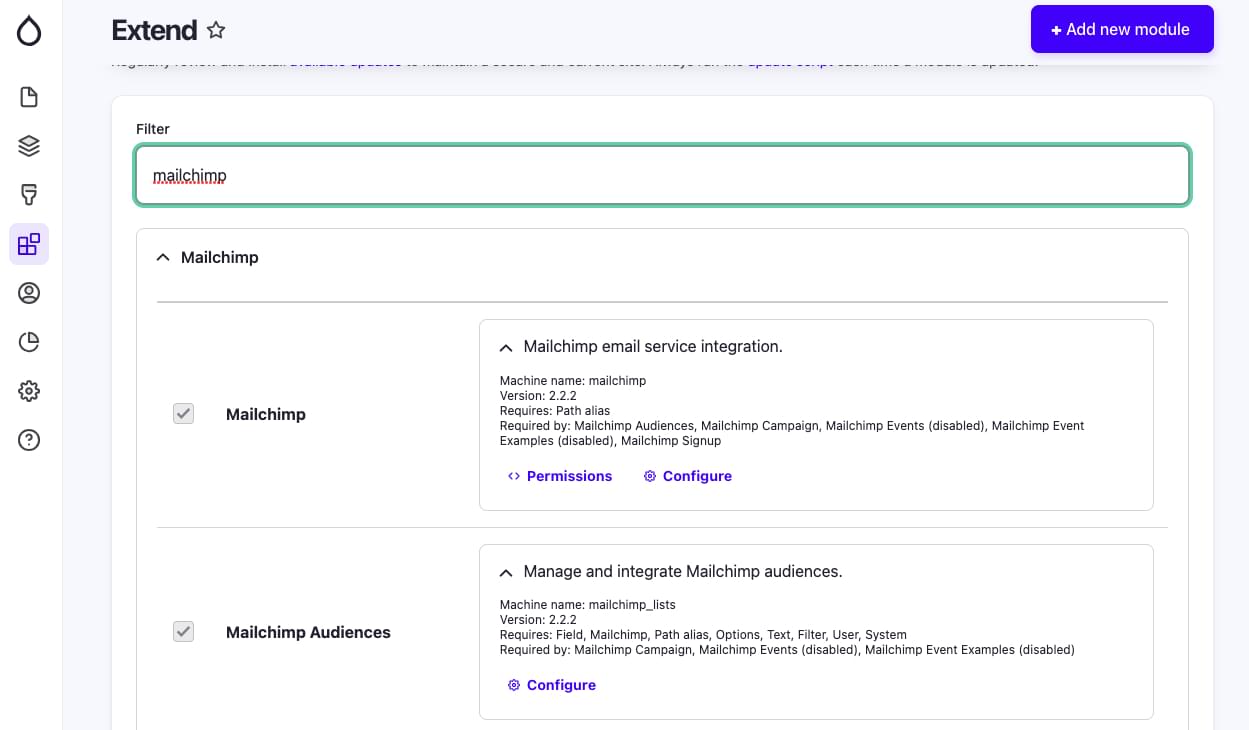
Let’s begin by installing the module. In your admin panel, find Extend in the menu. Search for the Mailchimp module. If you don’t find it, download it from here, click on the Add new module button (top right corner), and then upload the downloaded file.
Now that you’ve installed the module, enable both the Mailchimp and the Mailchimp Audiences modules.
Step 2: Configuring the module
Now let’s connect the module to your Mailchimp account.
Scroll to the Configuration menu in the admin panel. Navigate to Configuration > Web services > Mailchimp. Under the Global Settings tab, you’ll need to add your Mailchimp API key. To find the key, click Account & billing > Extras > API Keys on your Mailchimp account. Copy the key and paste it into the module configuration page on the Drupal admin panel.

Save the configuration after adding the API key, and voilà! Your Mailchimp integration is now set up and ready to go!
Sign Up the Audience
As an example, I’ll show you how to create a targeted email newsletter campaign that sends personalized content based on the audience’s interest. This will involve creating the audience, setting up the form on your Drupal website, merging fields with Mailchimp, and sending targeted emails out.
To begin with, let’s create an audience for those who sign up for your newsletters on your website.
Creating the audience in Mailchimp
Visit the Audience dashboard in your Mailchimp account and click Create New Audience.
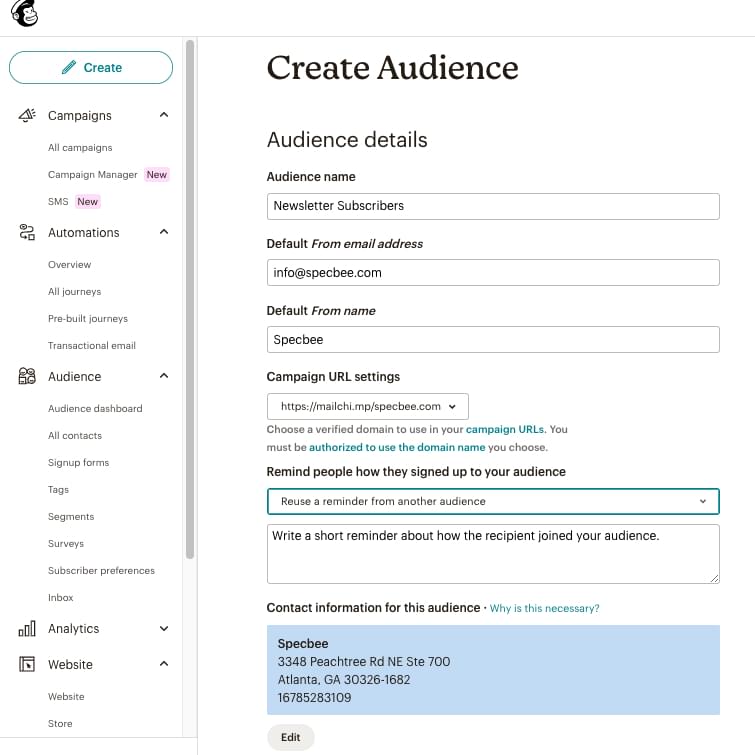
Make sure you enter all the required details accordingly, like the name (keep it relevant to what kind of audience this is). The From address helps when you want to send an automated reply or when using it within mail campaigns. The same goes with the From name. Save your audience, and you’re now ready to add your contacts!
Additional audience fields
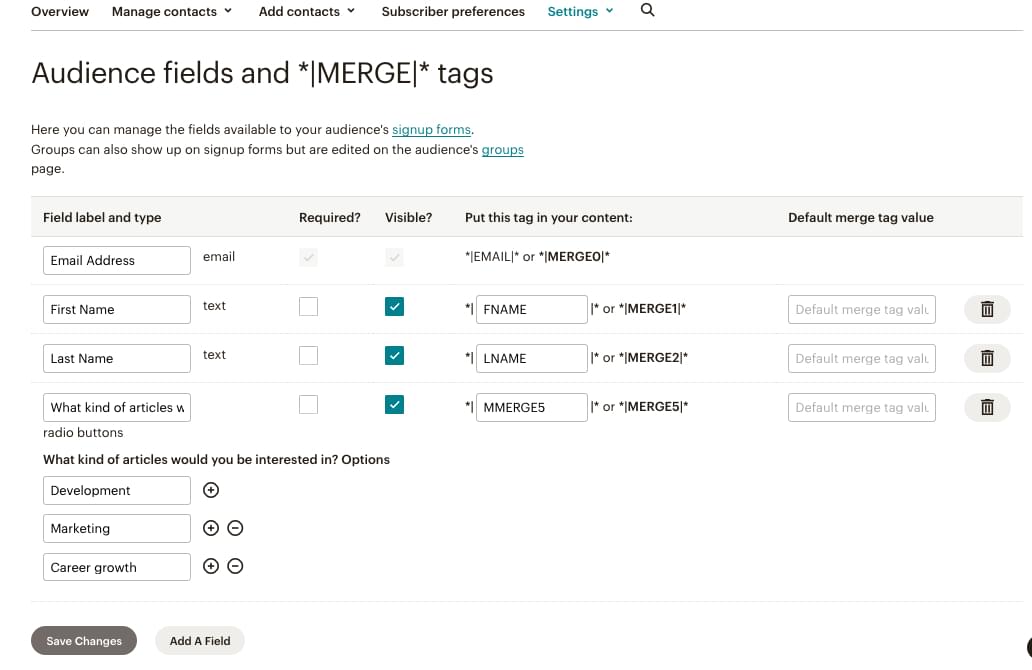
By default, Mailchimp gives you three fields to use: First name, Last name, and Email address. But what if you want to add more fields to know your audience better (and so you can target them better!)? For that, within the audience you just created, click on Settings > Audience fields and *MERGE* tags.

Here, you can add the custom fields you want to see in your newsletter signup form. You can also customize your Merge tags, which are basically dynamic contents of an email campaign that can be used to personalize your email.
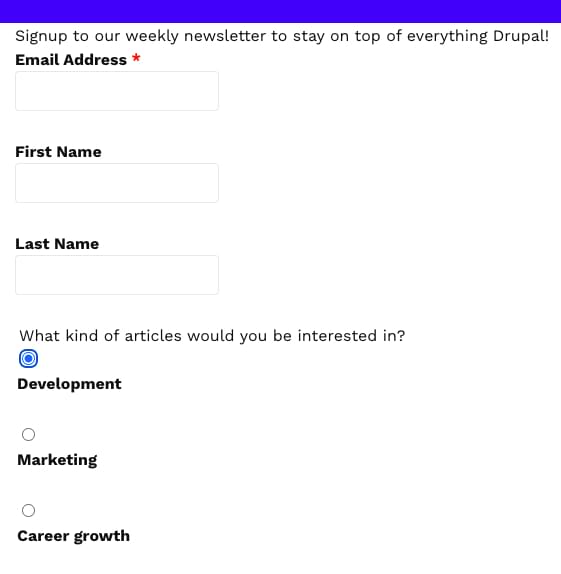
For this example, I’m adding a radio button field that has three options: Development, Marketing, and Career growth. Based on these interests, I can then send targeted email campaigns. Once you add all the fields you need, hit Save Changes.
Building a newsletter sign-up form on Drupal
On your Drupal admin dashboard, navigate to Configuration > Web services > Mailchimp > Signup Forms. In the top right corner, click on the + Add Signup Form button. Enter all the details as required as shown in the screenshot below.

I’m selecting a Page instead of a Block here, but you can even select a block and then add that block to any page you wish. Now that I’ve selected Page, I need to enter a URL.
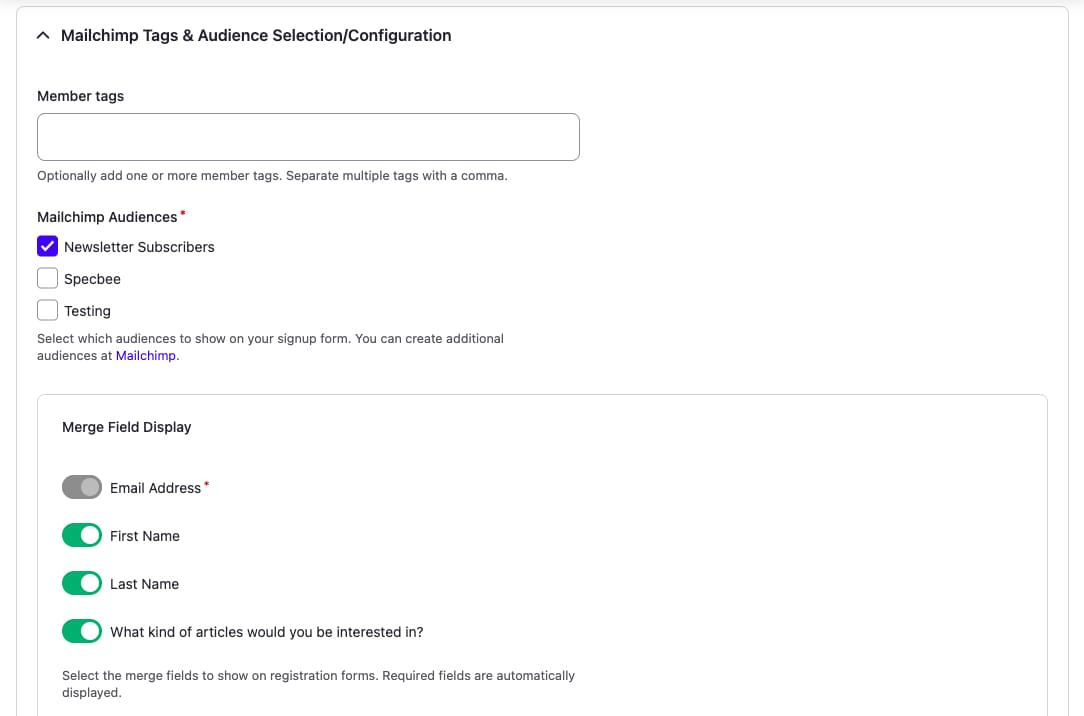
Moving on to the next section, here’s where you can select the Mailchimp audience, tags, and fields. If you take a look at the screenshot below, you’ll notice that the audience I’ve created — “Newsletter Subscribers” — appears here along with my other audience lists. When you select the audience, you’ll see that all those merge fields you added will show up under the Merge Field Display section. Select everything you need and hit Save!
You can now view your newsletter form by navigating to the URL you just created (such as /newsletter-signup-form).
Segmenting your audience
Now that you’ve created your audience and signup form, let’s start segmenting them. For my targeted newsletter campaign, I want to segment my audience based on their interests. So I’m going to create three segments on Mailchimp, since I have three interests. I’m doing this so that I can send out personalized emails and content that they want to actually see.
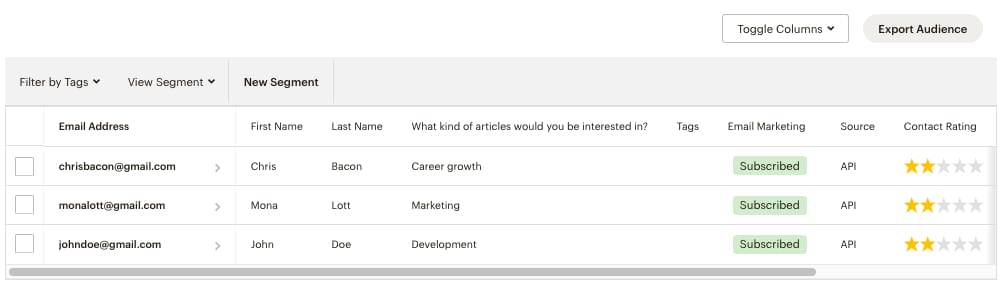
But before I do this, I need some audience! Let’s add some dummy signups so I can show you how it works. The image below shows my audience list on Mailchimp.
To create a segment, click on the New Segment button on the table. You have a wide variety of fields and choices for creating this segment. I’m going to select the “Interests” field and select the match as “Development”.
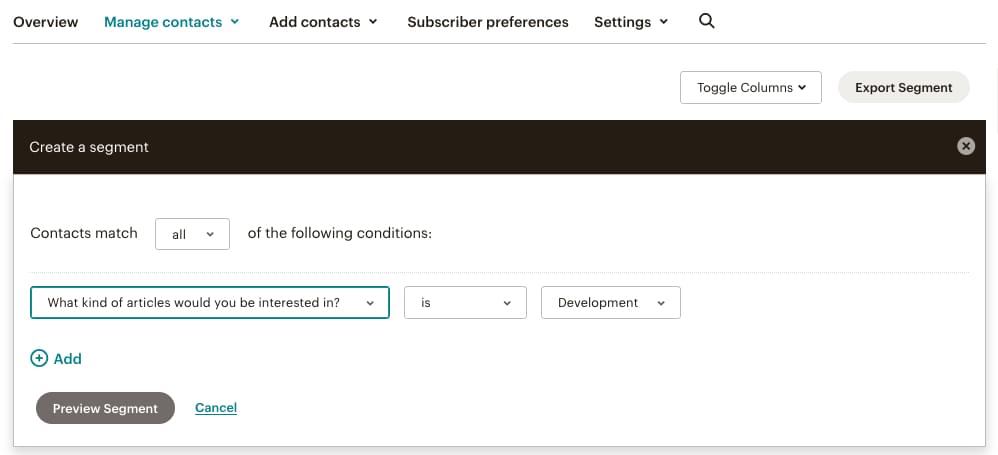
Once done, click on Preview Segment > Save Segment. Give a name to your segment. I’m calling it “Development”, because that’s most apt for my targeted audience. Click Save.
In the same way, I’m going to create two more segments for the “Marketing” and “Career Growth” interests. Once you’ve created all your segments, as soon as someone signs up for your newsletter, they’ll be automatically segmented accordingly.
Creating the Targeted Email Campaign
Now that we’ve got everything else out of the way, let’s get down to business! While you can also create email campaigns straight from your Drupal website as well, in this example, I’m going to create one on Mailchimp.
Head to Campaign > All Campaigns > Create New. I’ve selected the non-fancy, Regular Email option. In the To section, I’m going to select my audience (Newsletter Subscribers). Under Send To, let’s select the segment. Optionally, you can also select the Do not send to field and select the segment you wish to exclude.
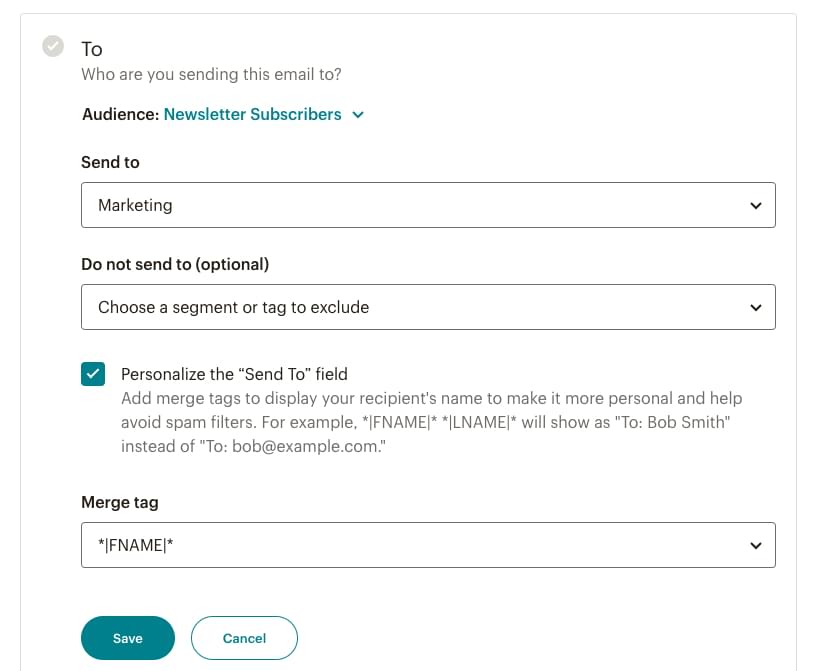
An email that uses the audience’s first name is always more effective than one that doesn’t. So, let’s add the FNAME merge tag to the “To” field. It can also be added to the Subject or email content (see screenshot below).

Triggers and Automation
A trigger initiates automation. For example, you can set a trigger to send an automated email to every new person who signs up for your newsletter. There are many pre-built triggers available in Mailchimp for you to use. You can also craft your own custom automation journey.
I’ll take you through a quick example of setting up an automated welcome email to all those new signups to your newsletter. That means that, as soon as anyone uses your Newsletter Signup form on your Drupal site, they’ll receive a welcome email. Note that this feature requires a paid Mailchimp plan.
On your Mailchimp dashboard, head to Automations > Pre-built Journeys > Find & welcome new contacts > Welcome new contacts.
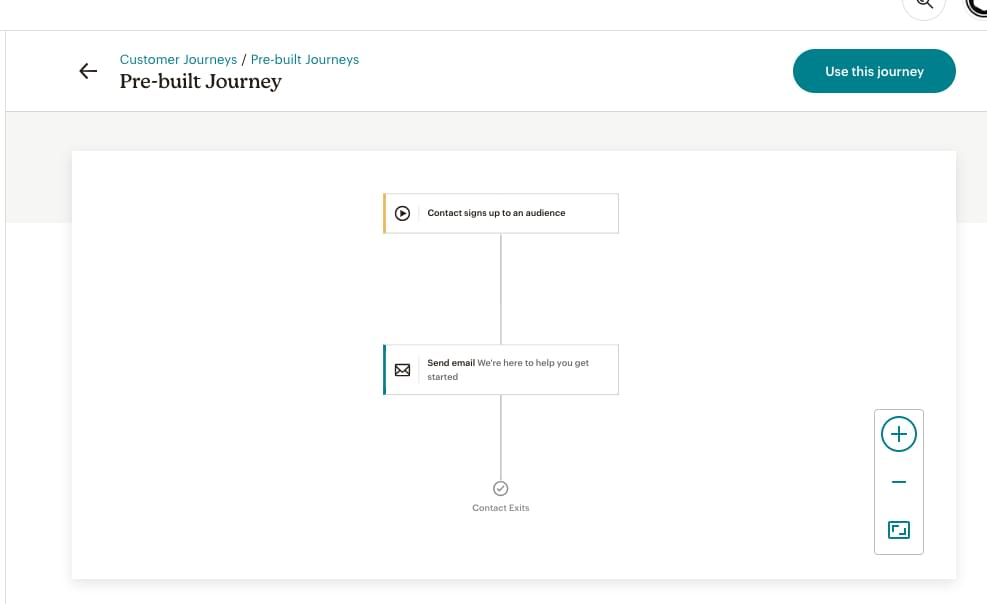
You’ll understand through the flow that this is a simple customer journey that has just one trigger and one action. Now when you click on the Use this journey button on the top right, it’s going to ask you to select an audience from a dropdown list. Once you select the audience, you’ll now be able to:
- Filter out the audience. This means that you can send personalized welcome emails based on their preferences (in my example, the interest field) by creating different journeys for each segment.
- Design and personalize your welcome email by using pre-built templates or by creating your own.
- Select a schedule for the welcome emails to trigger.
- Add a different starting point for their journey other than a new signup — for example, based on their engagement levels or signup date to celebrate their anniversary.
When you’ve set it up, all you need to do is Turn on the journey you just built. Congratulations on creating a personalized email campaign!
Wrapping Up
So there you have it, the dynamic duo of Mailchimp and Drupal working in perfect harmony. Bringing them together can do wonders for your marketing efforts. Despite rapidly evolving marketing trends, the personal touch will never go out of style. So, go ahead and craft those targeted campaigns. With Mailchimp and Drupal, you’re in control, and your audience is in for a treat. Time to hit Send and watch the results roll in!